
Unique DIY Projects at Kridzil
The Kridzil Team loves sprucing up the Resort with wonderful DIY projects and boy, do we have some nifty tips and tricks up our sleeves.
If you’re looking to add some colour to your garden, especially in the colder months when everything looks dry and dull, make unique gifts or creative wall art, keep the kids busy with fun crafts, or accessorise your garden with authentic hanging plant holders – then you have come to the right place.
Check out what the Kridzil Team have been up to lately:
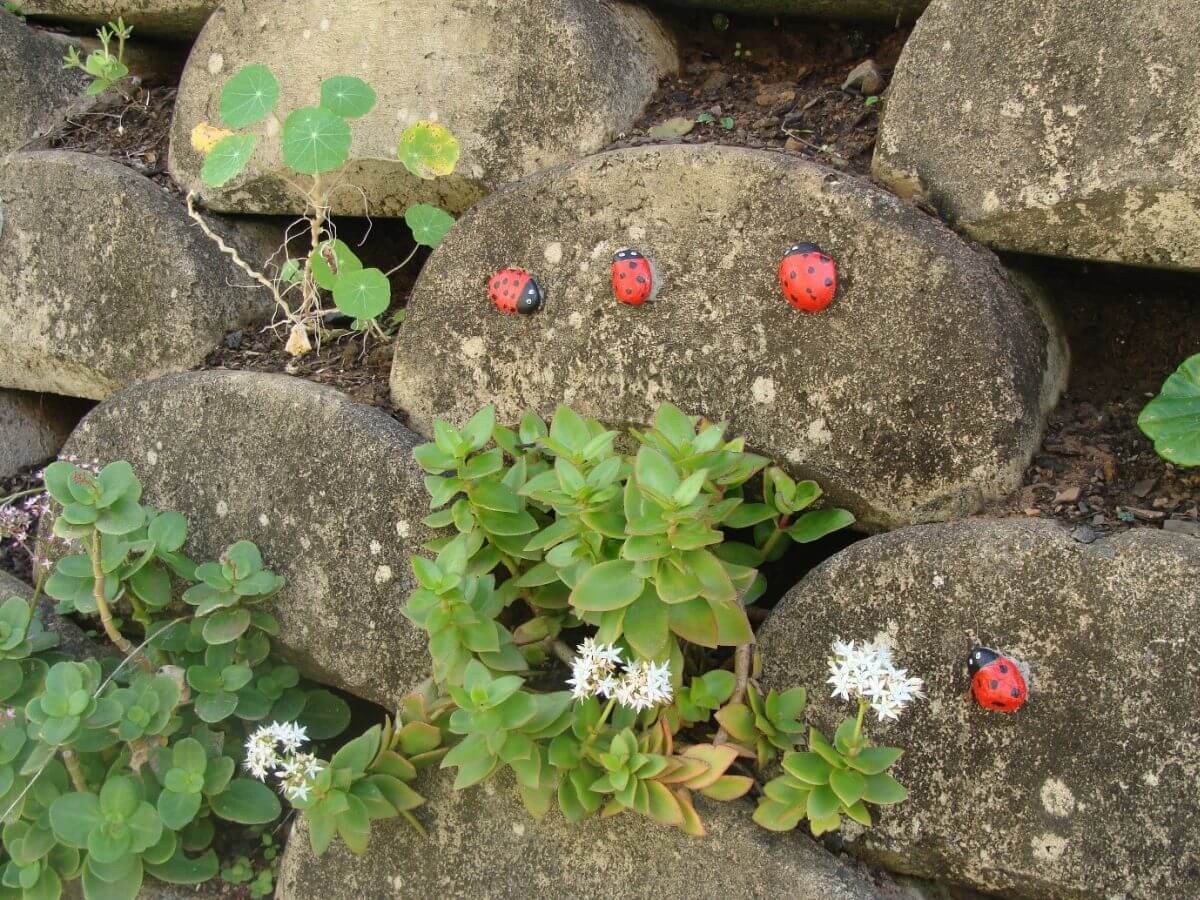
It’s a Little Ladybug
Create an adorable scene in your yard with this ladybug garden décor. These lovely ladybugs will brighten up your garden, especially in the dry and dull months; they are also great in keeping the kiddies entertained by getting them involved in making and painting them, or making a fun game in which the kiddies have to guess how many ladybugs are in the garden.
What you need:
* Pebbles or rocks (any size will do)
* Art or acrylic paint (red, black and white)
* Small paint brushes
* Key Coat
* All-purpose adhesive glue or building cement
Method:
1) Paint the pebble or rock completely red.
2) Once the red paint is dry, paint a black semi-circle head on the ladybug and small black dots on the body.
3) Give the ladybug eyes by simply painting two evenly spaced white dots on the head.
4) Using Key Coat, paint underneath the ladybug, and on the surface of where you would like to place the ladybug. (Key Coat bonding liquid allows for the ladybug to stick).
5) Using an all-purpose adhesive glue or building cement, glue the ladybug onto the surface, for example, a lock block (as seen in the image below).
6) Leave to dry overnight and the next day the ladybug/s will be attached rock solidly.
Unique Gifts
The Kridzil Team spoilt dads on Father’s day with a uniquely handmade gift. Each dad at the Kridzil resort received a Therapy Box. The Therapy Box is quite a unique gift as it contains potting soil, a spade and fork, and herb seeds. The Therapy Box has a surprise element to it as the recipient won’t know which herb they have received and will only find out once their herb has started growing. This is a wonderful and unique gift idea that can be made for any special occasion, such as a birthday or anniversary.
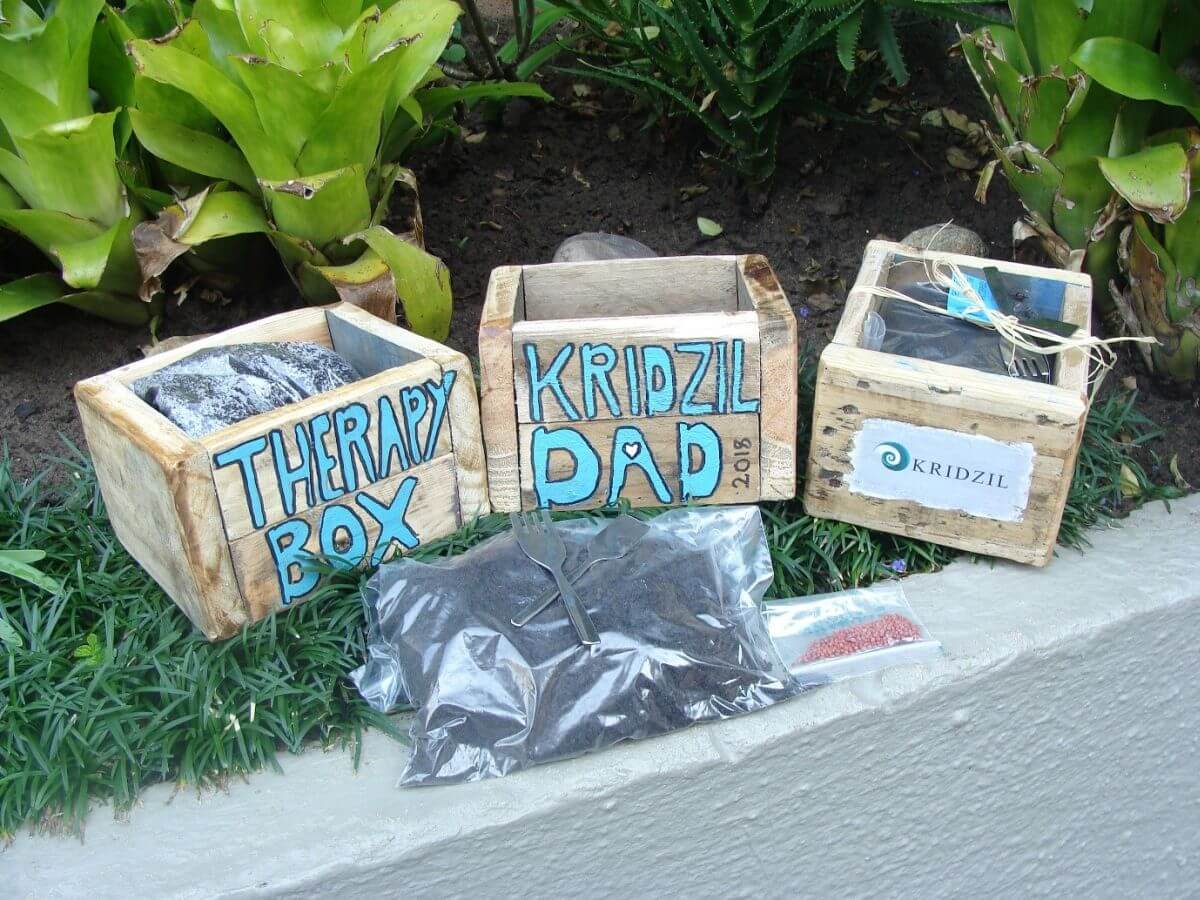
What you need:
* 2 x square wooden pallet slats (20cm in length x 20cm in height)
* 4 x rectangular wooden pallets slats (20cm in length x 10cm in height)
* 1 x square wooden pallet slat (16cm in length x 16cm in height)
* 24 x Long Flat Head Nails
* Hammer
* Art or acrylic paint
* Medium-sized paint brushes
* Potting soil
* 1 type of herb seed e.g. basil
* 1 x small and 1 x large zip lock bag
* 1 x old fork and teaspoon
* Sandpaper (320 grit)
* Hacksaw
* Raffia string
* Personalised gift card
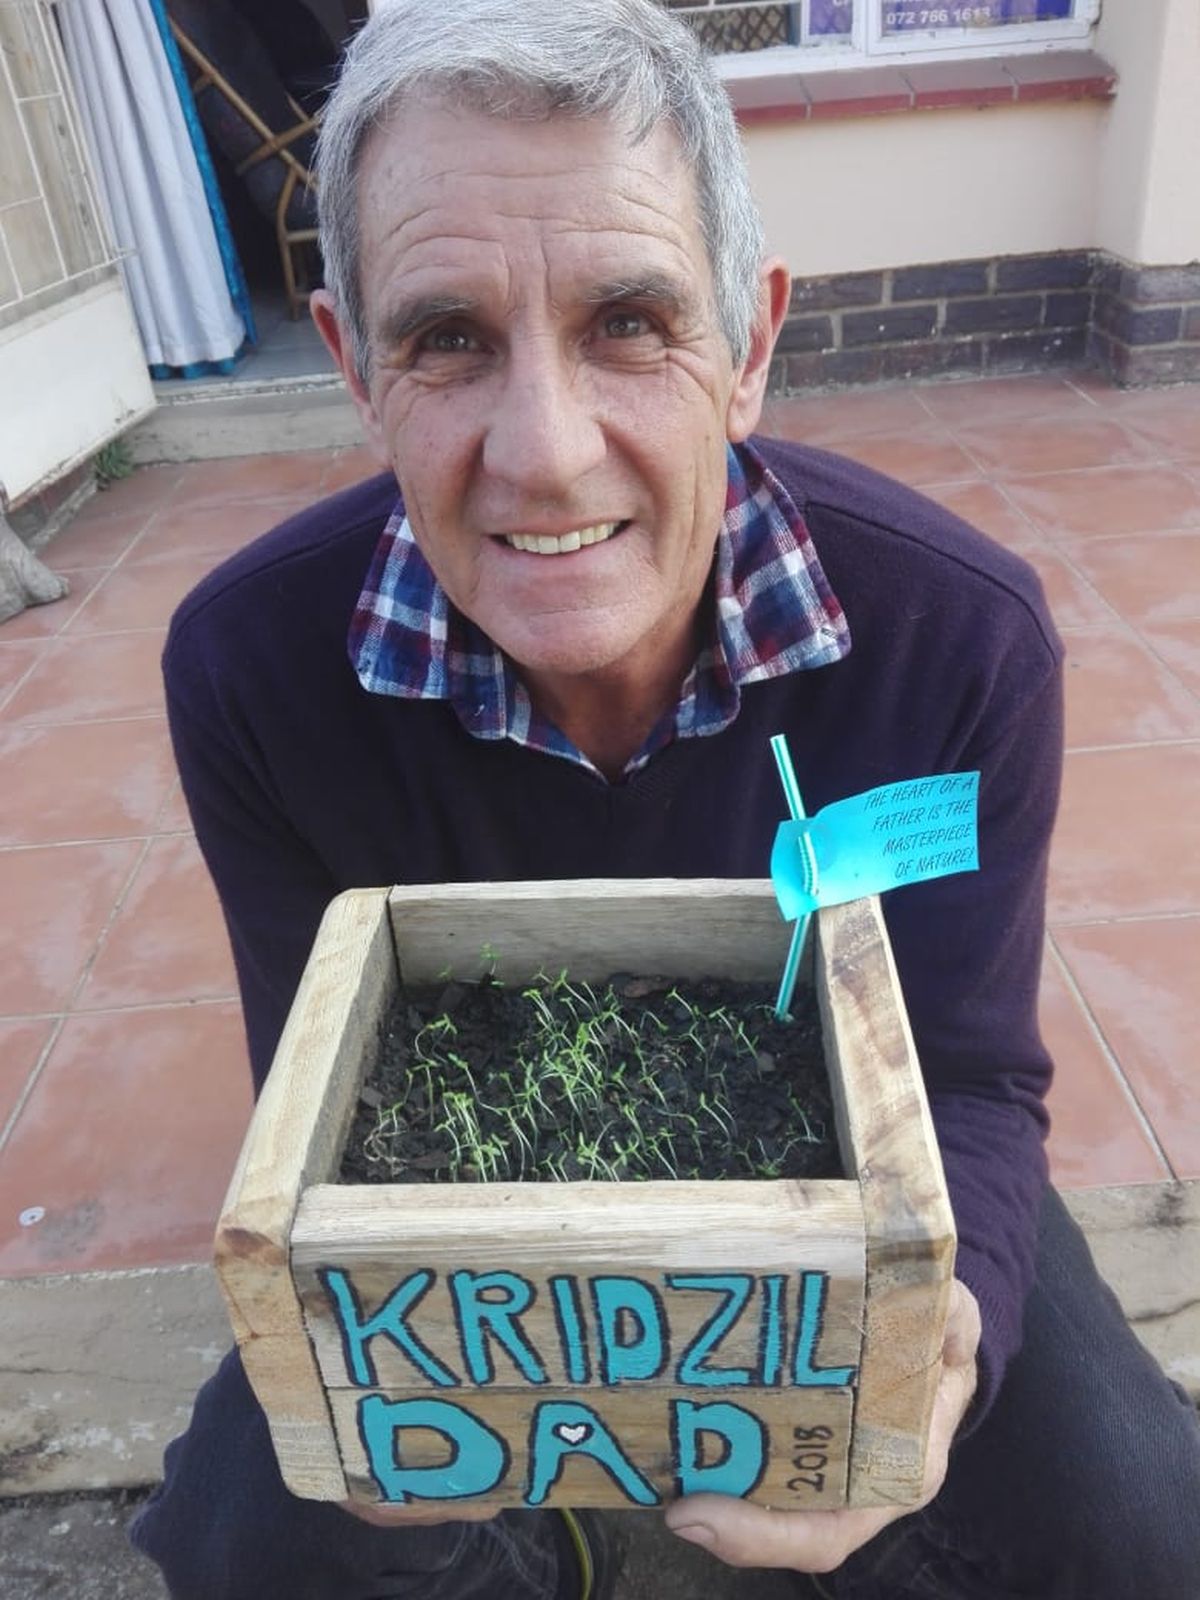
This Dad was surprised with coriander in his Father’s Day Therapy Gift Box
Method:
1) Assemble the perimeter of the box by fixing the 2 x square wooden pallets (20cm x 20cm) together with the 4 x rectangular wooden pallets slats (place 2 x rectangular wooden pallets on top of each other). This will be done by hammering 4 x long flat head nails along each side of the square wooden pallets.
2) To make the base of your box you need to insert the square wooden pallet slat (16cm x 16cm) at the bottom of your box. Next, hammer 2 x nails around the perimeter of the box at the bottom.
3) Paint a personalised custom message on the box (for example, Happy Birthday).
4) While the box is drying, pack the potting soil in the large ziplock bag and pack the herb seed in the smaller zip lock bag.
5) Place both ziplock bags inside of the gift box.
6) Hammer the old fork and teaspoon until they are flat.
7) Using your hacksaw, cut 1cm off the four tines of the fork, and 4 m off the handle of the fork.
8) Using your hacksaw, cut 1cm off the head of the teaspoon, and 2cm off the handle of the teaspoon.
9) Once you have cut your fork and teaspoon to size to create good garden tools, you need to sand down any rough edges with the sandpaper.
10) Use the raffia string to wrap around the box and tie a bow. (Tie the fork and teaspoon to the raffia string so that they don’t fall out of the box, as well as your personalised gift card).
Stunning Mermaid Wall Art
This stunning mermaid wall art is a lovely piece of wall décor that can be used for home or office interiors and exteriors that are inspired by a coastal theme.
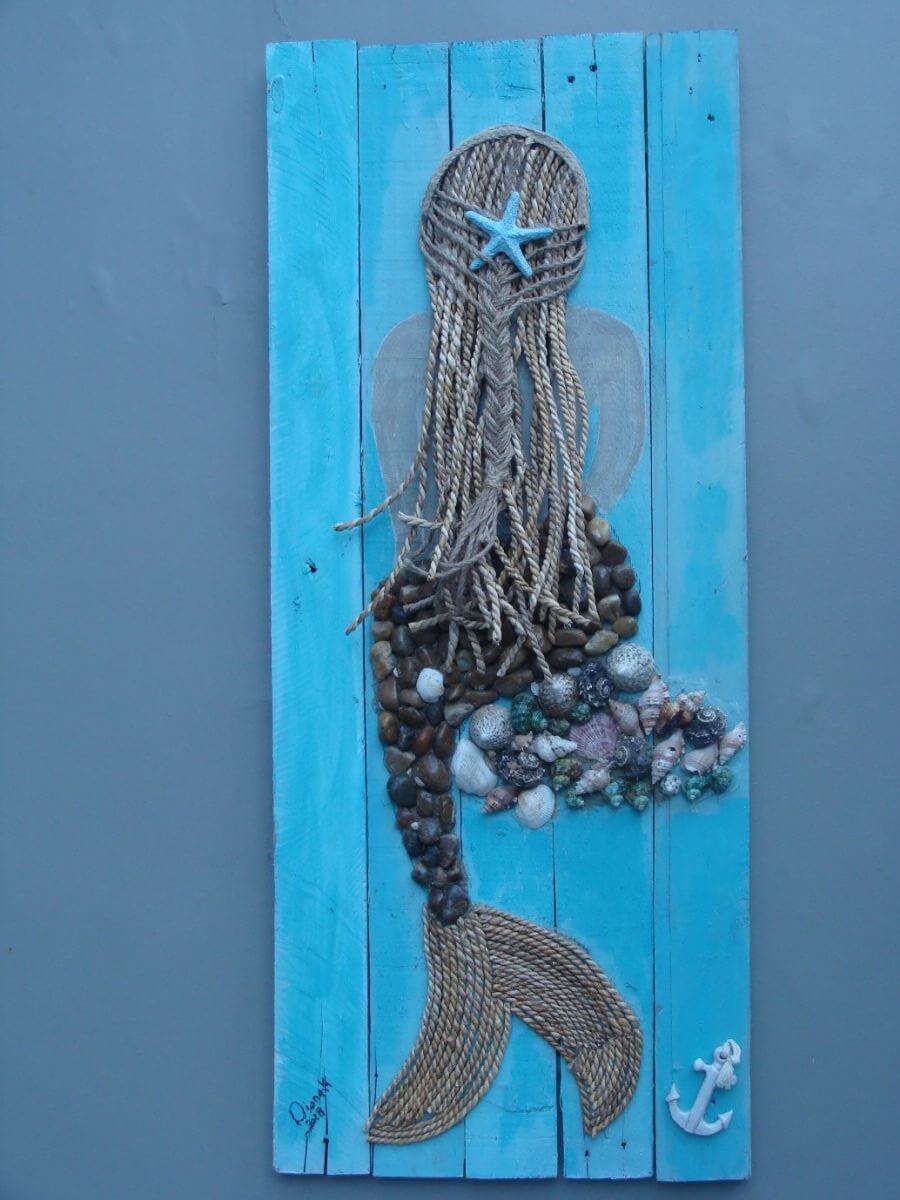
What you need:
* 5 x wooden pallet slats (cut to your desired size)
* 1 x piece of chipboard (must be narrower than the width and height of all the slats put together)
* Art or acrylic paint
* Pencil or charcoal stick
* Medium to large sized paint brush
* Stencil outline of a mermaid
* Small pebbles, sea shells and rope
* Silicone and stone sealer
* Sea sand or just regular sand
* Accessories to decorate your mermaid wall art (starfish, anchor etc.)
Method:
1) Join 5 pallet slats together at the back, this can be done by glueing or nailing a piece of chipboard that is slightly narrower than the width and height of the pallet slats, to the back of the fixed pallet slats.
2) Paint the surface of the wooden pallet in the colour of your choice, this will be your canvas.
3) Once the wooden pallet is dry, place the mermaid stencil on the canvas and outline it onto the canvas using either a pencil or charcoal stick.
4) Using silicone, stick the pebbles and shells to the canvas to form the body of the mermaid.
5) Once the pebbles and shells are stuck in place, fill the gaps in with silicone and sprinkle the sea sand or regular sand in the gaps, this creates a more natural and real look.
6) Cut short to long strips of rope and neatly glue them down to make the mermaid’s tail.
7) To make hair for the mermaid, cut various lengths of rope and glue them to the pallet with silicone. (You can twist or plait the rope to give the effect of real hair).
8) Add the starfish and anchor accessories to the mermaid pallet as seen in the image below.
9) Once all the pebbles, shells and rope are stuck in place and are dry, gently brush stone sealer all over the mermaid to enhance the colour, and to protect against bad weather.
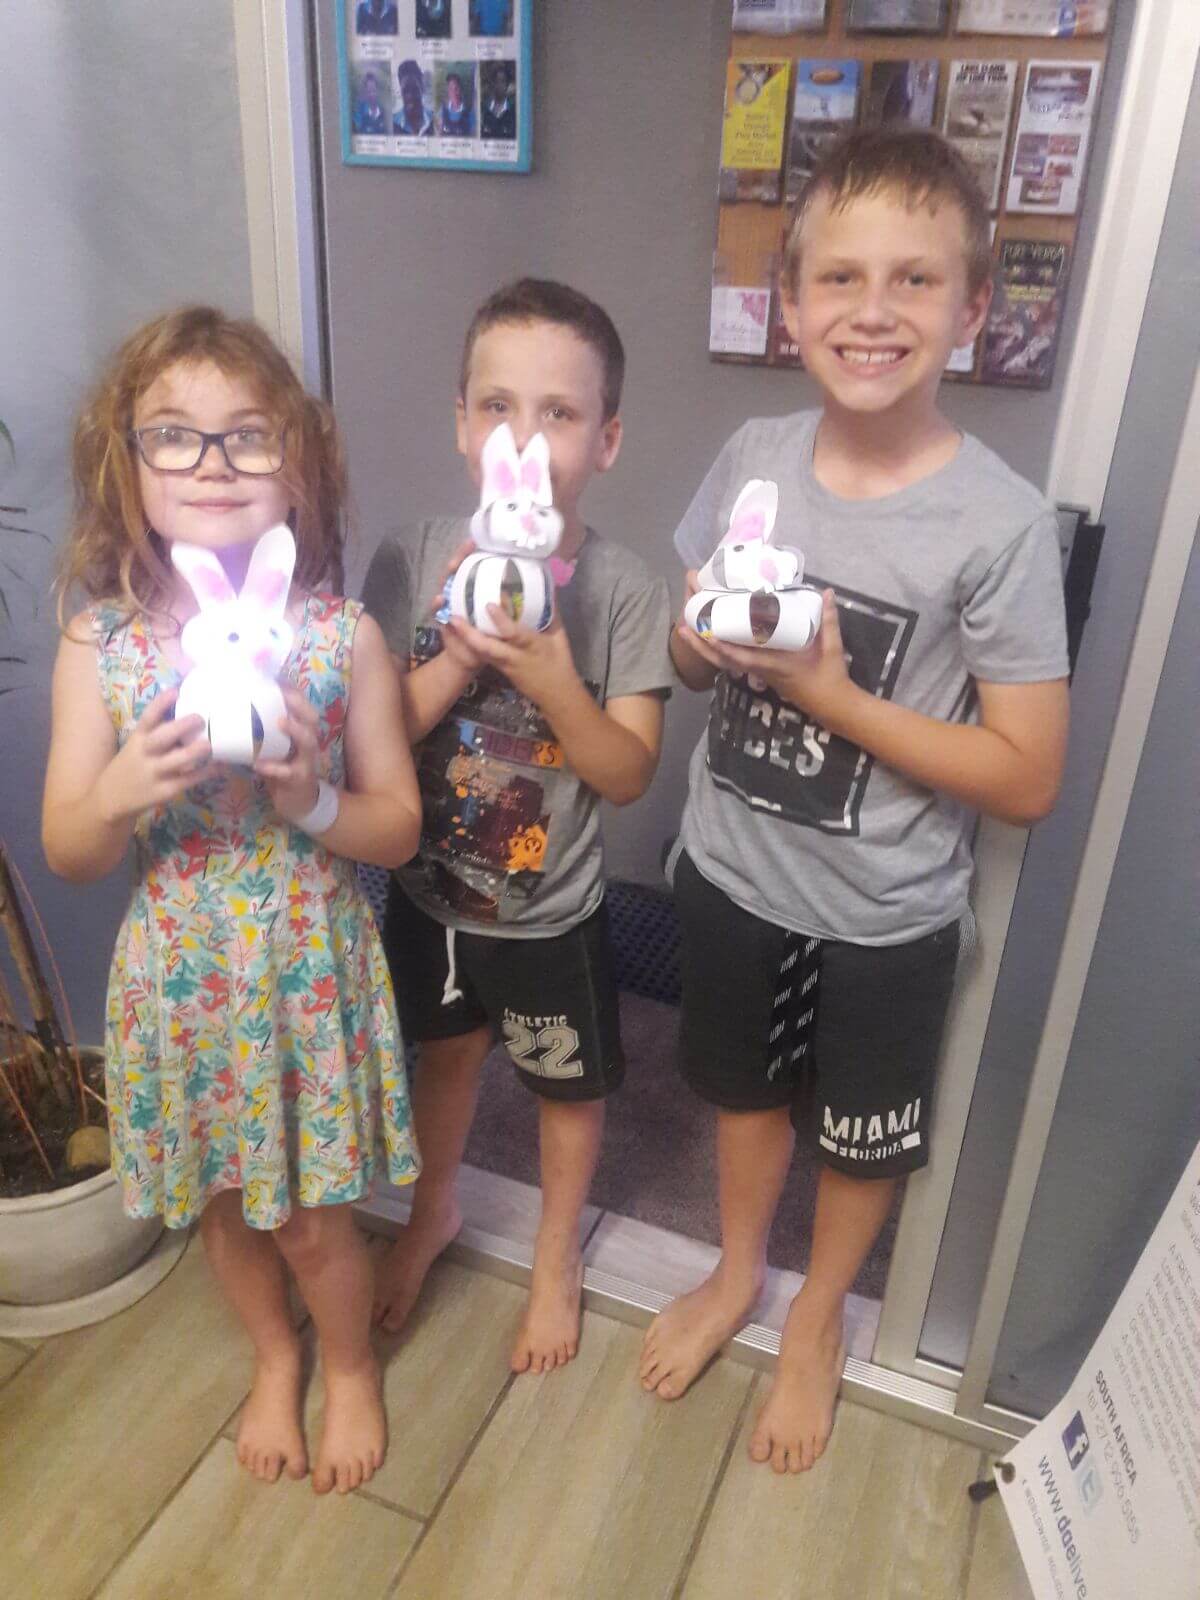
Cute Bouncing Easter Bunny Paper Craft
Hop, hop it’s time to learn how to make a super easy bunny papercraft. You can watch the Bouncing Easter Bunny Paper Craft Video Tutorial here or follow these simple step-by-step instructions:
What you need:
* Two sheets of A4 paper (can be any colour – depending on what colour you want your bunny to be)
* Pritt Glue
* Stapler, pencil, scissors and a ruler
* Pink fluff or wool
* Two flat stick-on eyes (buttons work just as well)
* Genkem Glue
* Marshmallow Easter eggs… MMM!
Method:
1) To make the body for the bunny you will need to cut out 4 long strips of paper (cut along the length of the A4 paper). The width of the strips should be about 3cm wide.
2) To make a head for the bunny you will need to cut out 3 shorter strips of paper (cut along the width of the A4 paper). The width of the strips should be about 3cm wide.
3) The width of the strips should be about 3cm wide.
4) Take 2 long strips and glue them together making a cross. Take another 2 long strips, and glue them over the cross to make a snowflake. All strips must be evenly distributed (no need to be super precise though).
5) Take the “snowflake” and staple the strips together, forming loops, until all of the strips are stapled together and you end up with a nice looking ball for the body. Don’t forget to put the Easter eggs inside before you complete the ball!
6) Do the same with the 3 short strips you cut out for the head.
7) Glue the sticky eyes or buttons onto the bunnies head.
8) Cut teeth out of white paper and stick onto the bunnies head.
9) Cut out 2 nice bunny ear shapes of equal size. Bend the bottom of the ears to make it easier for you to stick them onto the bunnies head.
10) Glue the paper balls together. You might need to hold them together for a while for the glue to dry solidly.
11) Take the pink fluff and give the bunny a round tail, pink-centred ears, and a nose.
Hanging Boat Plant Holder
These easy-to-make hanging boat plant holders are a must-have accessory in your garden.
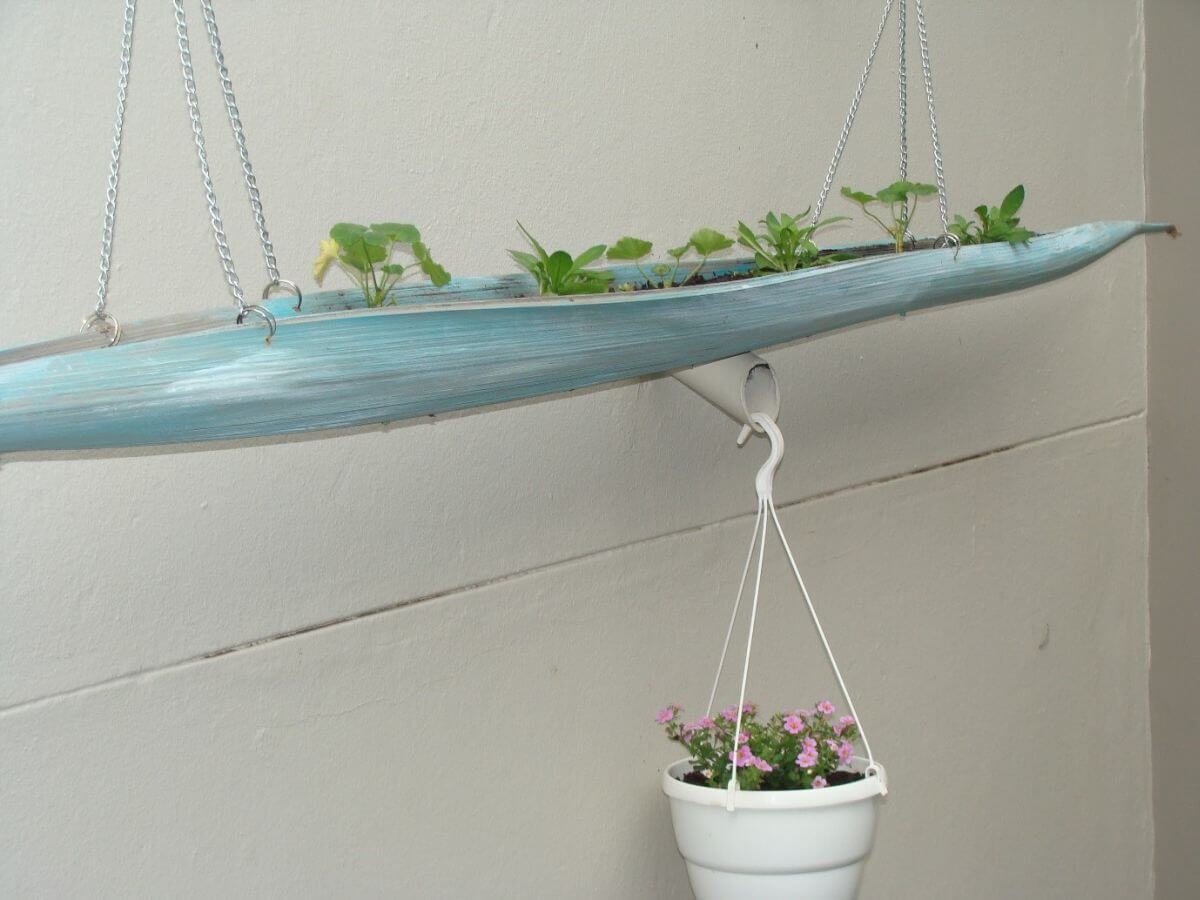
What you need:
* Dried palm seed leaf
* 8 x silver keyrings
* 6 x chains of about 20-25cm in length (as seen in the image)
* Paint (any colour of your choice) and a paint brush
* 1 x plastic straw
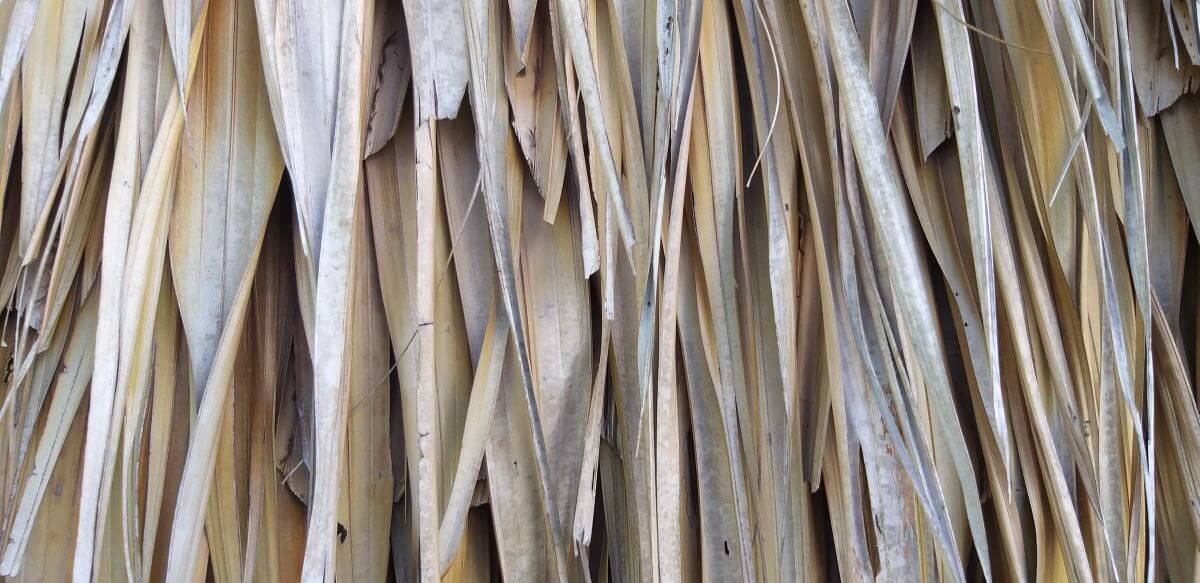
Dried palm seed leaf in its natural form
Method:
1) Paint the dried palm seed leaf in your chosen colour. This will form the boat.
2) Drill 3 holes on either side of the boat at the top.
3) Loop a keyring in each drilled hole and attach the chains to the keyrings.
4) Join the three chains together on either side with a keyring (so you can hang the boat planter).
5) Drill 2 holes approximately 25cm apart at the bottom of the palm seed leaf/boat (so that water can drain).
6) Cut 2 small pieces of the straw of about 2cm each in length, insert these into the holes you drilled (this will prevent the palm seed leaf/boat from rotting – as the water will drip straight out and not run back under the boat/seed leaf).
Stay tuned for more Kridzil DIY projects! Kridzil’s newest and most current DIY project will certainly be out of this world and truly unique… Oh, the suspense!
Love to DIY? Tell us what your best DIY project is; who knows we might just try it out and feature it in our next Unique to Kridzil blog article.